By default, most of the ready-made affiliate blogs come preloaded with Clickbank and Amazon offers.
If you want to replace those default offers because:
- you have your own products/services to promote
- you want to replace it with a better offer from other affiliate networks like Commission Junction, LinkShare, JVZoo, etc.
- the offer is no longer existing on Clickbank or the vendor has closed his/her affiliate program from the public
Now, there are two options to replacing those offers:
Option 1: Change ad codes in the Widgets area
The widgets area is WordPress' built-in page for managing widgets. The advantage of using the widgets page is that you can still re-use that widget even if you change to another theme.
1 Login to your WordPress dashboard.
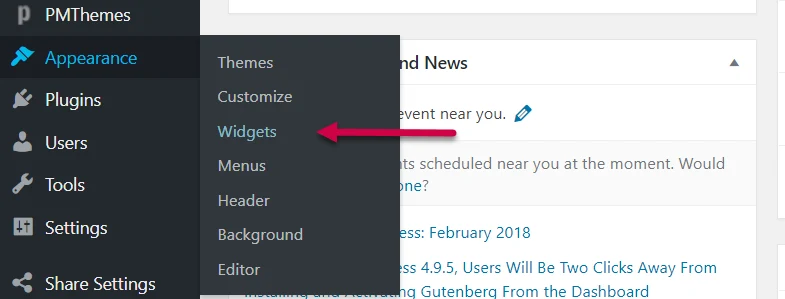
2 Go to the Widgets page by hovering your mouse over the "Appearance" (left side) then click on the Widgets submenu.
Here's how the Widgets area should look like.
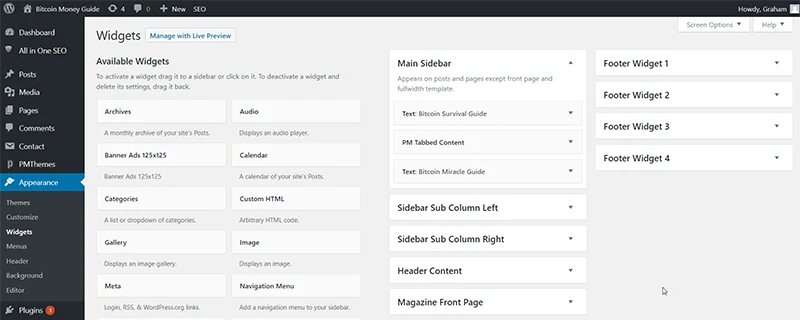
3 Start changing ad codes inside the Main Sidebar widgets box.
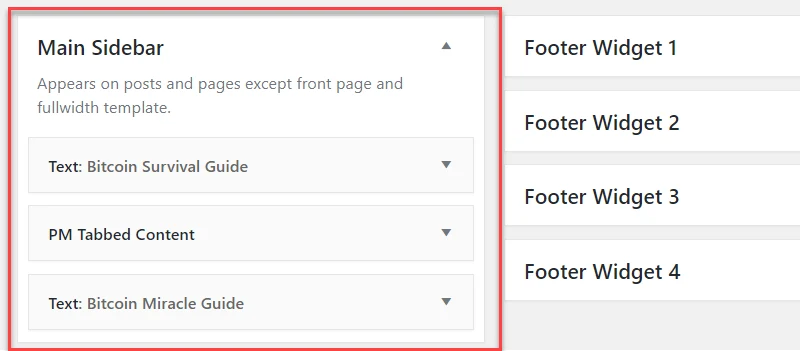
Ad codes here appear on the Sidebar area of your site.
4 Open the first text box.
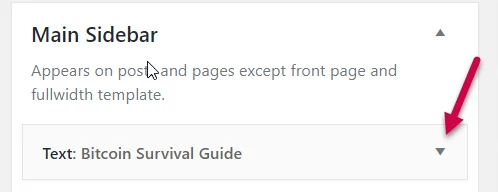
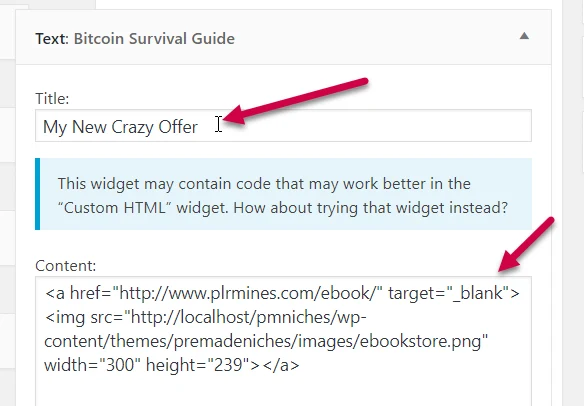
5 Copy and paste your own ad codes replacing the default codes.
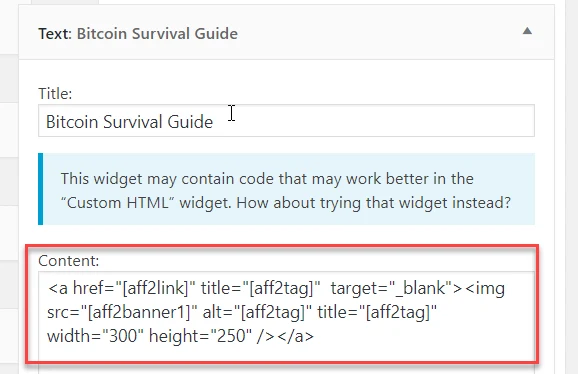
Default Ad Codes:
New Ad Codes:
6 Don't forget to click the "Save" button.

7 Now, do the same procedure with the other text boxes.
The next text box under "Main Sidebar" holds the code for the 2nd affiliate offer. It's the 2nd banner ad for Sidebar Ads.
The text boxes inside "Sidebar Sub Column Left" and "Sidebar Sub Column Right" hold the skyscraper banners (usually 160x60 and 120x60 banners) for "Sidebar Sub Ads".
The text boxes inside "Header Content" hold the banner (usually 728x60) for "Header Ads".
The text boxes inside "Magazine Front Page" hold the banner for "Frontpage Ads".
The text boxes inside "Footer Widget 1", "Footer Widget 2", "Footer Widget 3", "Footer Widget 4" hold the banner ad for "Footer Widget Ads".
NOTE: Notice that the default codes are actually in the "shortcodes" form. This is because the theme was designed with shortcodes. Those shortcodes relay whatever banner and the affiliate link that has been set on the ADS Settings page.
If you want to take advantage of this feature, this leads us to Option 2.
Option 2: Change offers in ADS Settings page
The ADS Settings page is controlled by a plugin called "Ads Settings" which is pre-installed with your blog. If you disable that plugin that page will not be visible.
Let's say you want to replace affiliate #2 with the new offer because the old one is no longer existing on Clickbank.
How to know its affiliate #2?
Go to the Widgets area and inspect its code. You'll see an aff2 mark on its shortcodes. If the shortcode has the aff1 mark, then it is affiliate #1.
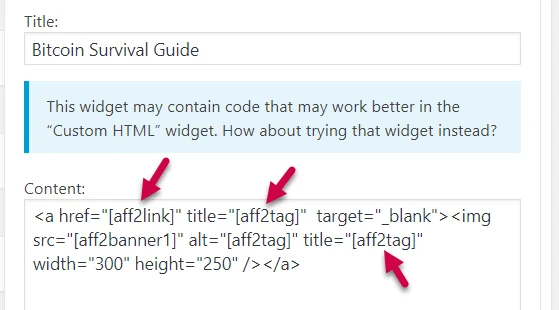
So here's how to change affiliate #2:
1 Login to your WordPress dashboard.
2 Go to the ADS Settings page by clicking any of the ADS Settings links.
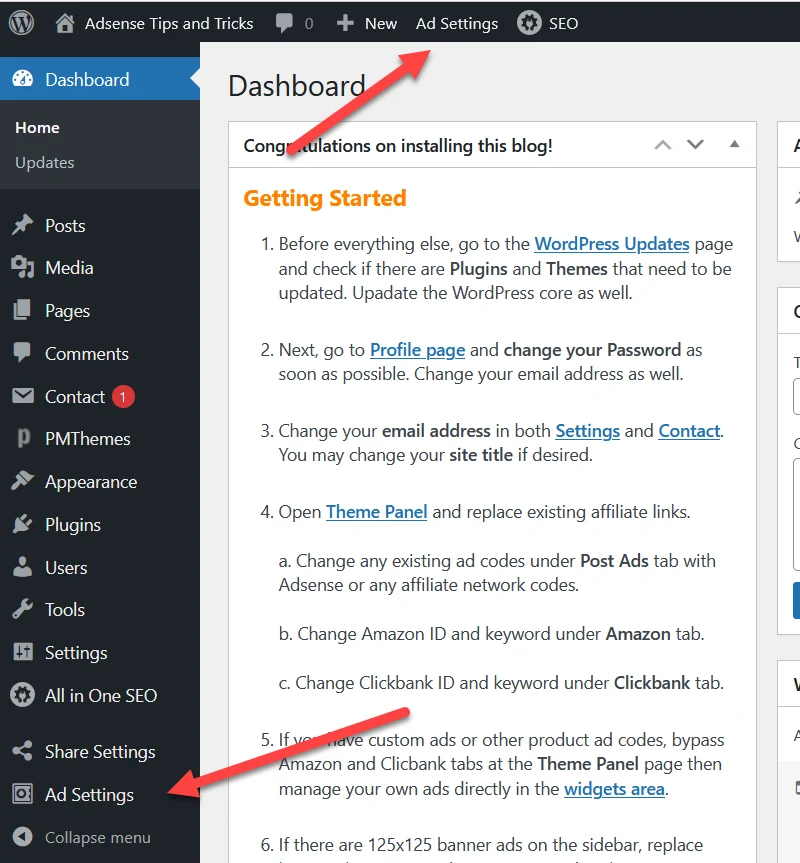
3 Click on the Clickbank tab.

4 Click "Replace Clickbank Hoplink".

5 Replace Affiliate Link #2 with your newly encoded hoplink.

6 Next, click "Banner Images".

7 Scroll down until you see the portion for AFFILIATE LINK #2 banner images.
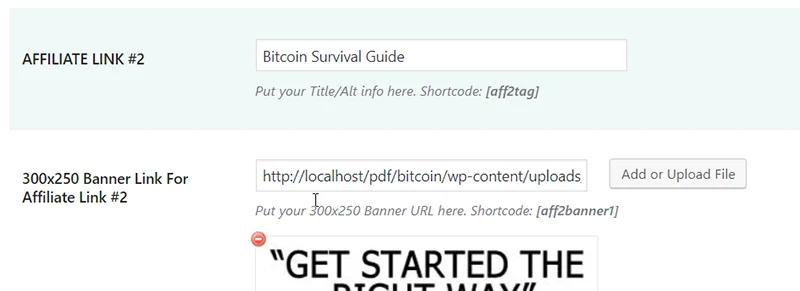
8 Enter title for your new offer.

9 Now, delete the first banner then upload your replacement.
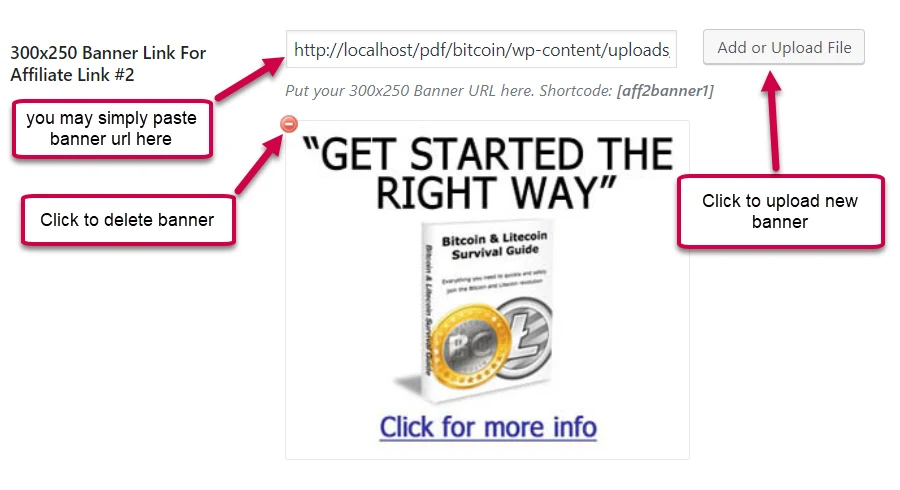
10 Go ahead and change the image for the next banner.
11 Don't forget to click the "Save Settings" button when done.
12 Check your site and that's it! Follow the same steps if you want to change Affiliate Link#1.
If you are familiar with WordPress, everything should be simple and easy. Just don't be afraid to test. Explore. Test again. Mess it up once in a while... and you will learn.


